
This guide shows how to route MegaSync traffic outside your VPN securely using an SSH SOCKS5 tunnel to a remote server. It includes all setup steps, verification, and persistence configuration on macOS.
Why This Setup Is Needed
Some VPNs block or interfere with MegaSync's long‑lived TLS, WebSocket, or QUIC connections. When this happens, MegaSync becomes stuck in a permanent "Connecting…" state. By routing MegaSync through a remote SSH SOCKS5 tunnel, all Mega traffic bypasses the VPN entirely while the rest of your system continues using the VPN normally.
Prerequisites
macOS with administrative rights
MegaSync installed
SSH access to a remote server (example:
user@your-server-ip)A valid SSH private key file (example path:
/Users/your-username/.ssh/your-key)
Step 1. Verify Remote SSH Access
Ensure you can connect to your server:
ssh -i /Users/your-username/.ssh/your-key user@your-server-ip
Change:
Replace
your-usernamewith your macOS username.Replace
your-keywith your private key filename.Replace
your-server-ipwith your actual remote server IP address.
If this connects successfully, exit back to your local machine.
Step 2. Create SSH SOCKS5 Tunnel
Run this command locally to open a SOCKS5 proxy on port 1080:
ssh -N -D 1080 -i /Users/your-username/.ssh/your-key user@your-server-ip
-N– don’t execute remote commands.-D 1080– open a local SOCKS5 proxy at port 1080.
Keep the terminal open to maintain the tunnel.
Step 3. Test the Proxy
Check if traffic routes through the server:
curl -x socks5h://127.0.0.1:1080 https://ifconfig.me
You should see your server’s public IP.
Confirm Mega endpoints respond:
curl -I -x socks5h://127.0.0.1:1080 https://g.api.mega.co.nz/
Expected output includes HTTP/1.1 301 Moved Permanently.
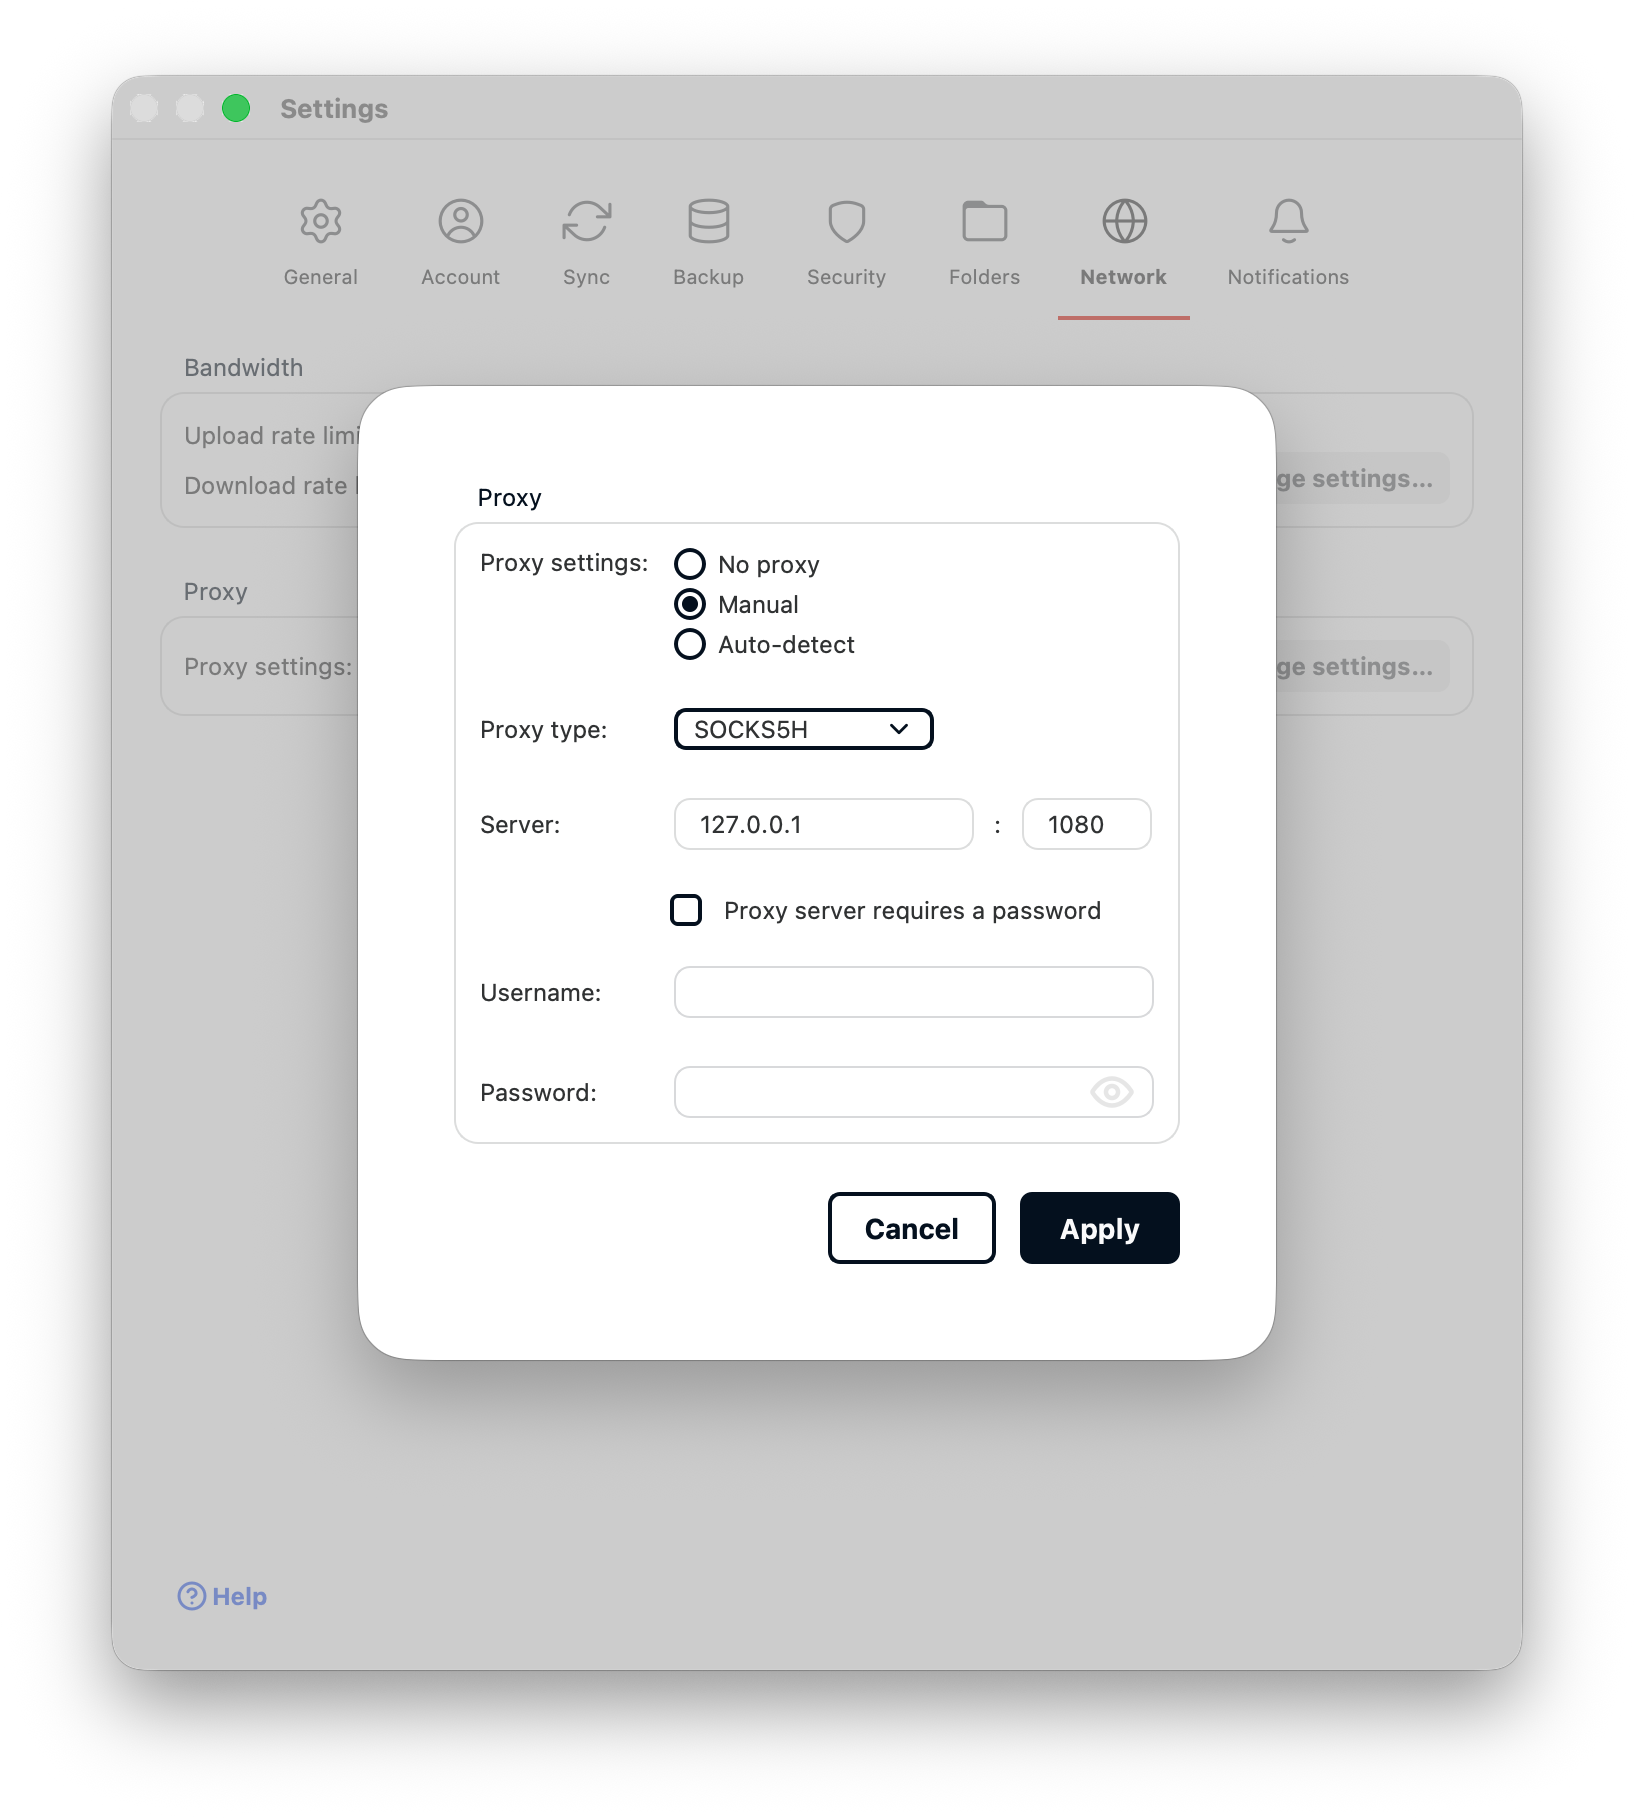
Step 4. Configure MegaSync
Open Preferences → Network → Proxy in MegaSync.
Proxy type: SOCKS5
Server:
127.0.0.1Port:
1080No authentication
Click Test connection — it should succeed.
Step 5. Persist the Tunnel with SSH Config
Edit your SSH config:
vim ~/.ssh/config
Add:
Host your-server
    HostName your-server-ip
    User user
    IdentityFile /Users/your-username/.ssh/your-key
    AddKeysToAgent yes
    UseKeychain yes
    ServerAliveInterval 60
    ServerAliveCountMax 3
    ExitOnForwardFailure yes
Change:
your-server→ a name you choose for the server.your-server-ip→ your remote server IP.user→ your remote SSH username.your-usernameandyour-key→ your macOS username and SSH key filename.
Start the tunnel with:
ssh -N -D 1080 your-server
Step 6. Automate with LaunchAgent
Create a LaunchAgent to auto-start at login:
mkdir -p ~/Library/LaunchAgents
vim ~/Library/LaunchAgents/com.user.megaproxy.plist
Paste and adjust the following:
<?xml version="1.0" encoding="UTF-8"?>
<!DOCTYPE plist PUBLIC "-//Apple//DTD PLIST 1.0//EN" "http://www.apple.com/DTDs/PropertyList-1.0.dtd">
<plist version="1.0">
<dict>
  <key>Label</key><string>com.user.megaproxy</string>
  <key>ProgramArguments</key>
  <array>
    <string>/usr/bin/ssh</string>
    <string>-N</string>
    <string>-D</string><string>1080</string>
    <string>-i</string><string>/Users/your-username/.ssh/your-key</string>
    <string>-o</string><string>ExitOnForwardFailure=yes</string>
    <string>-o</string><string>ServerAliveInterval=60</string>
    <string>-o</string><string>ServerAliveCountMax=3</string>
    <string>user@your-server-ip</string>
  </array>
  <key>RunAtLoad</key><true/>
  <key>KeepAlive</key><true/>
  <key>StandardOutPath</key><string>/Users/your-username/Library/Logs/megaproxy.out</string>
  <key>StandardErrorPath</key><string>/Users/your-username/Library/Logs/megaproxy.err</string>
</dict>
</plist>
Change:
- Replace every
your-username,your-key,user, andyour-server-ipwith your real values.
Load the LaunchAgent (no sudo):
launchctl bootstrap gui/$(id -u) ~/Library/LaunchAgents/com.user.megaproxy.plist
launchctl enable gui/$(id -u)/com.user.megaproxy
launchctl kickstart -k gui/$(id -u)/com.user.megaproxy
Verify the tunnel is active:
lsof -i :1080
You should see an ssh process listening on 127.0.0.1:1080.
Step 7. Confirm Everything Works
Restart your computer.
Verify the SSH process starts automatically:
lsof -i :1080Check MegaSync connectivity.
Step 8. Enabling Proxy in MegaCMD (Optional)
If you’re using MegaCMD, route it through the same proxy:
proxy socks5h://127.0.0.1:1080
Check that it was applied correctly.
proxy
# Proxy configured.
# Type = CUSTOM
# URL = socks5h://127.0.0.1:1080